Welcome to your go-to guide on choosing the right concrete for pavers in NZ. Whether you’re updating your driveway, building a garden path, or planning a full outdoor renovation, the material you choose will directly affect the strength, style, and longevity of your project. With New Zealand’s mix of wet weather and strong sun, it’s important to select concrete that not only looks good but also performs well under local conditions. In this post, you’ll learn why concrete pavers are a smart choice, which types work best for different spaces, and how to avoid common mistakes, so you can build something that lasts.
Concrete for pavers in NZ refers to the specific concrete mixes used to install durable, weather-resistant pavers for driveways, patios, and walkways. In New Zealand, the best concrete for pavers is typically a standard or reinforced mix designed to handle local climate conditions like heavy rain and frost. It offers long-term strength, low maintenance, and a clean finish, making it a popular choice for both DIY and professional projects.
Table of Contents
Why Concrete Pavers Are a Smart Choice in NZ
Concrete pavers have become a preferred option for many New Zealand homeowners and builders, and it’s easy to see why. They offer a balance of durability, style, and value that few other materials can match. Whether you’re upgrading a driveway, building a patio, or creating garden paths, concrete pavers stand out as a reliable solution. Let’s look at why they’re especially suited to New Zealand conditions and why they make practical sense for both residential and light commercial use.
Built for NZ’s Climate
New Zealand’s climate can be unpredictable, wet winters, frosty mornings, and strong UV exposure are common across many regions. Concrete pavers are built to handle these environmental challenges. Unlike materials that crack or shift under moisture or heat, well-installed concrete pavers are designed to stay intact. They don’t soften in the sun like asphalt, and they offer better drainage and frost resistance than poured concrete slabs.
Compared to gravel, concrete pavers provide a cleaner, more stable surface. Gravel tends to move around, develop ruts, and attract weeds, making it a high-maintenance choice over time. Asphalt is another option, but it often fades, cracks, and requires regular sealing. Concrete pavers resist these issues and continue to look great with minimal upkeep.
Versatile and Affordable
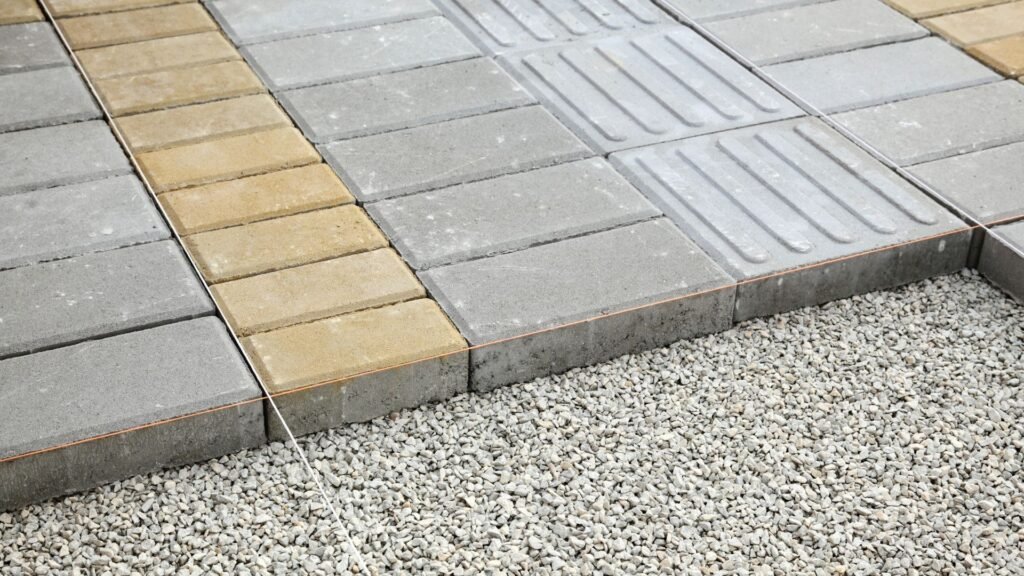
One of the biggest advantages of concrete pavers is their variety. You can choose from a wide range of colours, shapes, and surface textures to match your property’s style. Whether you prefer a modern look, a traditional brick pattern, or something unique, there’s a paver style to suit.
This flexibility makes them ideal for personalizing outdoor spaces. Plus, they come at a price point that makes sense for many NZ households. While natural stone can be costly and harder to install, concrete pavers deliver a similar aesthetic without stretching the budget. They’re also quicker to install, which can save you time and reduce labour costs.
For small businesses or landlords looking to upgrade walkways or parking areas, concrete pavers offer good durability without the higher cost of some commercial-grade materials.
Low Maintenance, Long-Term Payoff
Once installed, concrete pavers are incredibly easy to maintain. Regular sweeping and the occasional rinse are usually enough to keep them looking clean. Unlike poured concrete, which can develop large cracks that are expensive to fix, pavers allow you to repair only the damaged sections. If one or two pavers crack or shift over time, you can simply lift and replace them without touching the rest.
This modular design makes long-term maintenance more manageable and cost-effective. You avoid major repairs and keep your outdoor space looking sharp for years. Combined with their resistance to weeds, fading, and general wear, concrete pavers offer real value over time, especially when installed properly with a solid base and good drainage.
For New Zealand homeowners who want a dependable, stylish, and low-hassle paving option, concrete pavers are a smart, long-term investment. They perform well in all conditions, give you design freedom, and help you avoid the hidden costs that often come with cheaper alternatives.
Types Of Concrete Used For Pavers
Choosing the right type of concrete for your pavers can make a big difference in how long your paved surface lasts and how well it holds up under everyday use. In New Zealand, where weather conditions vary across regions, selecting the correct mix is essential. Below are the most commonly used types of concrete for paving jobs, each with its own strengths depending on your project’s needs.
Standard Concrete Mix
A standard concrete mix is the go-to option for most general paving applications in NZ. It’s easy to work with, cost-effective, and strong enough for patios, garden paths, and other light-to-moderate use areas. This type of mix is often made using a basic ratio of cement, sand, and aggregate, usually something like 1:2:4 (cement, sand, gravel). While you don’t need to get too technical, knowing that it’s a balanced mix designed for strength and workability helps when planning your project.
Standard concrete offers enough durability for everyday wear while being flexible enough for DIY installation. It sets well, performs in wet conditions, and can be used with most types of pavers or molds. For homeowners doing small projects like backyard walkways, this mix is often all you need.
Reinforced Or High-Strength Concrete
If you’re working on a driveway or any high-traffic area, you’ll need something stronger than the standard mix. This is where reinforced or high-strength concrete comes in. It’s made with a higher cement content and sometimes includes steel mesh, fibers, or rebar to add extra durability. These additions help prevent cracks and damage caused by heavy loads, especially from vehicles.
This type of concrete is commonly used in commercial paving or residential spaces that need to handle repeated pressure over time. It’s the best choice when long-term performance is a priority. Even though it costs a bit more, the investment pays off by reducing future repair and maintenance needs.
Decorative Or Exposed Aggregate Concrete
For homeowners who want both strength and visual appeal, decorative or exposed aggregate concrete is a solid option. It’s made by washing off the top layer of cement paste to reveal natural stones underneath. This creates a unique, textured surface that adds character to outdoor spaces like patios, pool areas, and walkways.
One of the main benefits of exposed aggregate is its slip resistance. The rough texture makes it a safer choice for areas that get wet, especially in rainy regions of NZ. It also requires little maintenance and ages well, often looking better over time as it blends into the surrounding landscape.
This type of concrete is ideal for those who want something more than a plain surface. It delivers both functionality and style, making it a popular choice in modern outdoor designs.
By understanding the different types of concrete available, you can choose the one that best fits your space, usage needs, and design goals. Whether you’re going for simplicity, strength, or style, there’s a mix that works for you.

Choosing The Right Mix For Your Paving Project
Selecting the right concrete mix is a key step in any paving project. Whether you’re laying pavers for a driveway, patio, or garden path, the type of concrete you choose will directly affect the strength, durability, and long-term performance of the surface. Not all concrete is made equal, and using the wrong mix can lead to cracking, poor drainage, or even early failure, especially in New Zealand’s unique weather conditions. Below are the most important factors to consider when choosing the right concrete mix for your space.
Load Requirements Matter
Before you decide on a concrete mix, think about how much weight the paved area will need to handle. A driveway that supports cars or light trucks needs a stronger, more durable mix than a backyard patio used for outdoor furniture. For example:
- Driveways need a higher compressive strength, often using a reinforced concrete mix or one with a 25–30 MPa rating. This ensures it can hold up under frequent vehicle pressure without cracking or sinking.
- Patios typically don’t need the same strength as driveways. A standard 20 MPa mix is often enough for pedestrian use and light furniture.
- Footpaths or walkways fall somewhere in between. If the path is near a driveway or may occasionally bear heavier loads (like rubbish bins or garden equipment), consider a slightly stronger mix.
Using a concrete mix that matches the load requirements helps prevent early damage, reduces maintenance costs, and keeps the surface safe and stable for years.
Drainage Considerations
New Zealand’s climate includes plenty of wet weather, especially in coastal and southern areas. That makes drainage a top priority when working with concrete for pavers. A poorly drained area can cause water to pool, leading to surface erosion, cracking, or the growth of slippery moss and algae.
The first step is making sure the paved area has a slight slope. A fall of around 1:100 (1cm drop per metre) is often enough to guide water away from the surface. In flat areas or zones prone to flooding, you may also need to install channels, drainage pits, or permeable pavers to support better water movement.
Also, the mix itself plays a role. If you’re working in a spot that often gets wet or has poor natural drainage, consider using a concrete mix designed for permeability or one that works well with gravel and sand sub-bases. This combination improves water flow and helps avoid long-term moisture damage.
Local Regulations And Supplier Advice
New Zealand has local council regulations that may affect what type of concrete you can use and how you’re allowed to build paved areas. In some cases, there are rules about impermeable surfaces, boundary drainage, or minimum thickness requirements, especially for driveways or front-yard projects near public footpaths.
Before starting any paving work, it’s smart to contact your local council or building authority to confirm whether you need approval. Even if no permit is required, it’s a good way to avoid issues down the track.
Likewise, your local concrete supplier is a valuable resource. Suppliers across NZ often have region-specific mixes designed to suit the climate, soil type, and common project needs in your area. If you’re unsure which mix to choose, they can suggest the right product and quantity for your site conditions and budget.
Taking the time to check both local guidelines and supplier advice helps you choose the most effective, compliant, and long-lasting concrete for your paving project. It also means fewer delays, no costly redos, and a better result overall.
DIY vs. Hiring a Professional: What’s Best for You?
Taking on a paving project in New Zealand means making one big decision early, should you do it yourself or hire a professional? Both options have their pros and cons, and what works best depends on your space, budget, skills, and timeline. Here’s a breakdown to help you figure out the smarter route for your situation.
When DIY Might Work
DIY paving is a realistic option for smaller projects like garden paths, patio spaces, or decorative walkways. These jobs are typically straightforward, don’t need heavy machinery, and allow for a learning curve. If you’re comfortable using basic tools like a wheelbarrow, shovel, and level, and you’re willing to put in the time, then DIY could save you money.
Another benefit of DIY is flexibility. You control the pace, materials, and design. It’s also ideal for those who enjoy hands-on work or want a personal touch in their outdoor space. Just remember, you’ll need to prep the site properly, measure accurately, and follow curing times carefully. Mistakes at any step can cost more to fix later.
When to Call the Experts
Larger paving jobs come with more complexity. If you’re planning a driveway, courtyard, or any area that supports vehicles or high foot traffic, hiring a contractor is usually the smarter choice. Professionals know how to grade the site correctly, select the right concrete mix, and ensure the finished surface won’t shift or crack over time.
Uneven or sloped terrain is another reason to bring in the pros. They’ll know how to manage drainage, prevent pooling, and avoid costly issues like erosion or frost heave. If your project requires permits, inspections, or compliance with local regulations, professionals can take care of the paperwork and make sure everything meets code.
Common Mistakes DIYers Make
If you’re leaning toward a DIY approach, it’s important to understand the risks. One of the most common errors is using the wrong concrete mix. Pavers need a specific ratio of cement, aggregate, and water to ensure strength and durability. A weak mix can lead to crumbling or cracking within months.
Poor compaction is another issue. Without the right tools or techniques, the base layer may shift over time, causing pavers to sink or become uneven. Drainage is also a frequent problem, if water can’t flow away from the paved area, you’ll end up with puddles or worse, structural damage.
To avoid these pitfalls, take your time researching, follow step-by-step guides, and don’t skip on prep work. If any part of the job feels beyond your skill level, it might be time to get a quote from a professional.
Making the right choice, DIY or professional, can save you time, money, and a lot of frustration. Weigh your options carefully, and plan your paving project with the long term in mind.
Step-by-Step: Laying Concrete Pavers
Installing concrete pavers is a practical way to upgrade any outdoor space, whether it’s a driveway, garden path, or patio. With the right approach, you can achieve a finish that’s durable, level, and built to last. Here’s a step-by-step breakdown to help you lay concrete pavers properly.
Plan and Measure the Area
Start with a clear plan. Before touching a shovel or buying materials, sketch the layout of your paver project. Use graph paper or digital tools to map out the exact dimensions of your space. Be sure to include curves, borders, and features like garden beds or steps.
Measure the total area to calculate how many pavers you’ll need. Add 5–10% extra for cutting and breakage. Planning ahead helps avoid costly mistakes and ensures a smooth installation process.
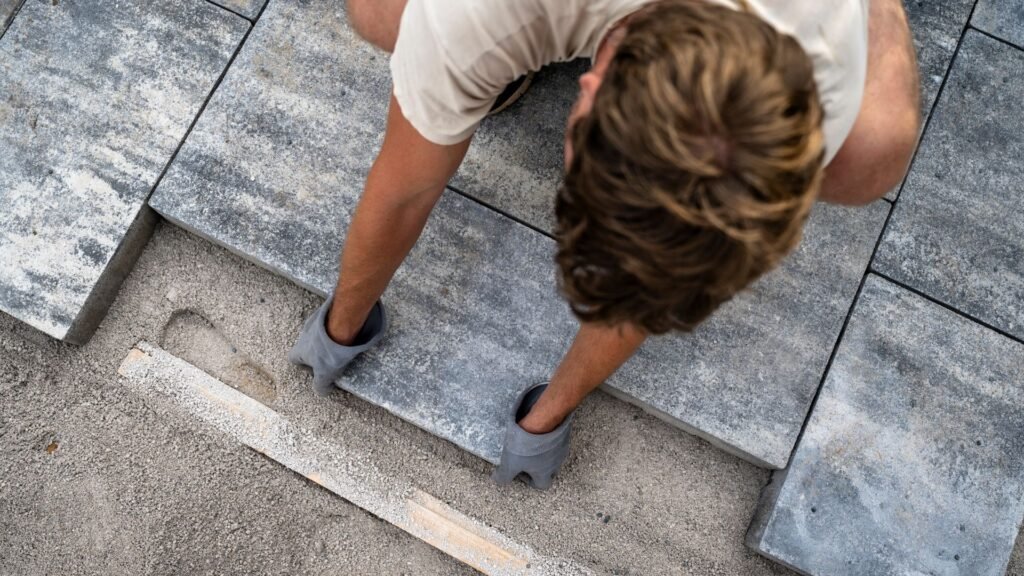
Prepare the Base
A strong base is critical for paver stability. Begin by excavating the area to a depth of 100–150mm, depending on the paver thickness and expected traffic load. For driveways, go deeper. Remove any grass, roots, or soft soil.
Next, compact the soil using a plate compactor or hand tamper. Add a layer of crushed rock or GAP 40 basecourse and compact again. This layer should be level and firm. A solid base prevents shifting, sagging, and cracking over time.
Mix and Pour Concrete (For Casting or Bedding)
If you’re casting your own pavers or using a concrete bed, you’ll need a proper mix. A simple and reliable concrete mix ratio is 1 part cement, 2 parts sand, and 3 parts gravel, with enough water to achieve a workable but not overly wet consistency.
For bedding purposes, pour a thin layer of concrete (about 25–40mm) over the compacted base. Work in small sections to prevent the mix from drying before laying pavers. Use a trowel to level the surface and prepare it for paver placement.
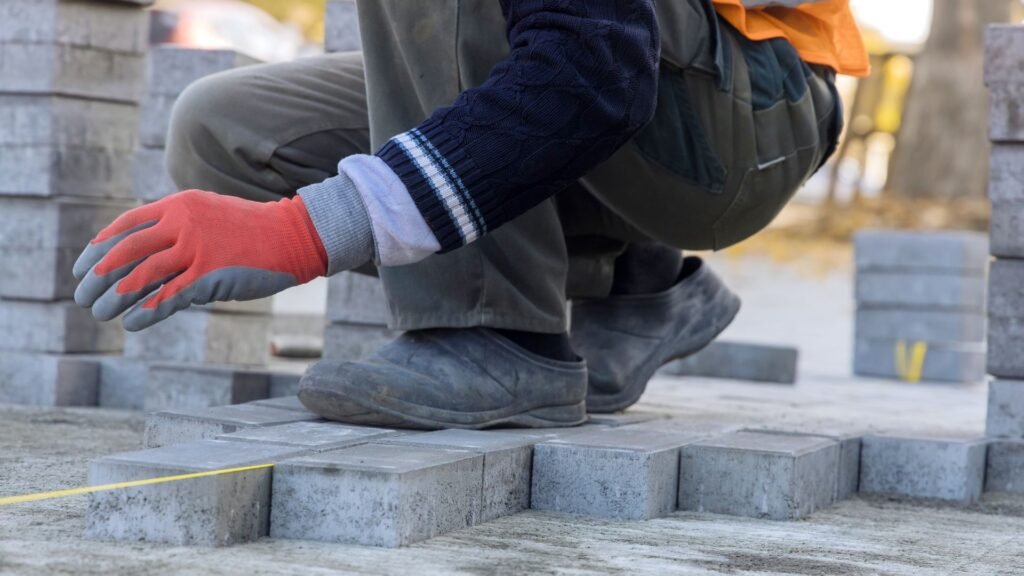
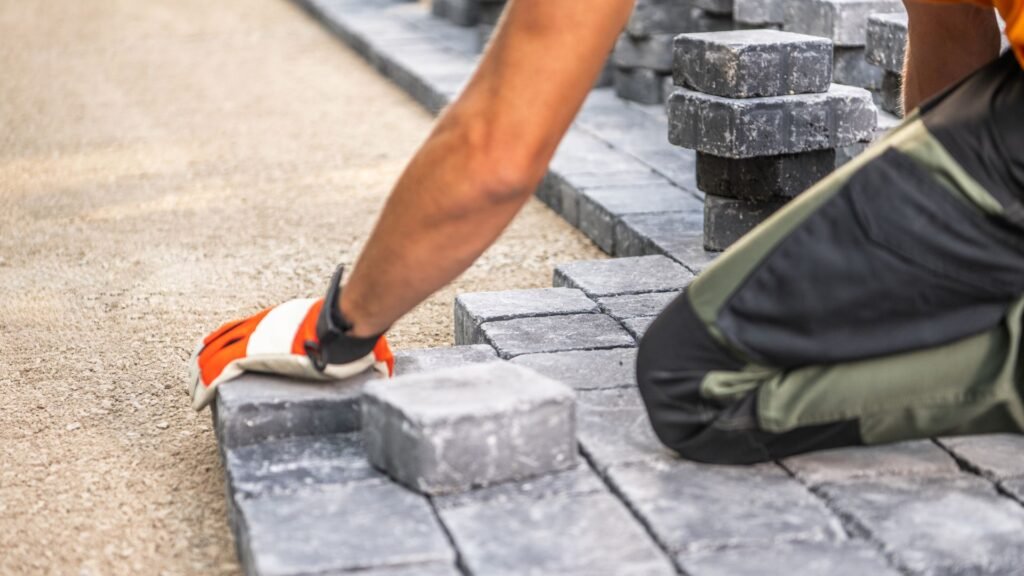
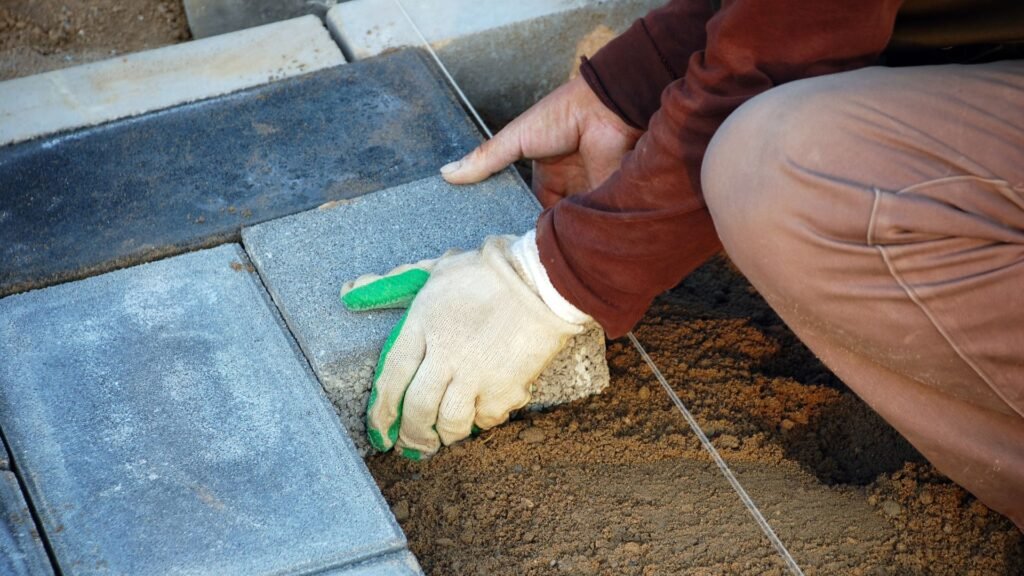
Lay the Pavers and Fill the Gaps
Carefully place each paver onto the wet concrete or sand bed. Use spacers or leave consistent gaps (typically 2–5mm) for expansion and joint filling. Tap each paver gently with a rubber mallet to secure it in place and keep the surface even.
Once all pavers are laid, fill the joints using fine sand or concrete grout, depending on your finish preference. Sweep the material into the gaps and compact lightly. Sand allows flexibility, while grout offers a more permanent lock.
Cure, Clean, and Maintain
Proper curing ensures the concrete sets correctly and gains full strength. Avoid heavy foot traffic for at least 48 hours. If you’ve used wet concrete, allow seven days before placing furniture or vehicles. Full curing takes around 28 days.
For the first wash, wait until the surface is fully set. Use a gentle hose spray to remove dust and debris. Avoid using high-pressure cleaners right away, as they may damage the joints or surface finish.
To maintain your pavers, sweep regularly, clean with mild soap as needed, and reapply joint sand every 1–2 years. If sealed, reapply the sealer according to the product’s recommended cycle.
Laying concrete pavers the right way helps you get long-lasting results and avoid common problems like uneven settling or water pooling. A well-installed paver surface not only improves your outdoor space but also adds value to your property.
Where to Buy Concrete for Pavers in NZ
Choosing the right supplier is just as important as picking the right concrete mix. In New Zealand, you have access to several well-established brands and retailers that offer quality concrete products for paving projects of all sizes. Whether you’re a homeowner doing a weekend project or a contractor managing multiple sites, it’s essential to source your materials from reliable, local suppliers who understand NZ’s conditions and building standards.
Local Suppliers to Know
When it comes to buying concrete for pavers in NZ, a few trusted names stand out. These suppliers offer consistent product quality, helpful customer service, and convenient delivery options.
- Firth is one of the most recognized concrete suppliers across New Zealand. They offer a wide range of concrete mixes, including decorative options and ready-mix products suited for driveways, patios, and walkways. Firth also provides technical support and advice for residential and commercial projects.
- Atlas Concrete has served the Auckland and Northland regions for decades. They specialize in ready-mix concrete and aggregate products and are known for their competitive pricing and fast delivery services. They also offer exposed aggregate and decorative concrete suitable for paver applications.
- Mitre 10, while more of a general home improvement retailer, is a convenient option for smaller quantities of concrete, especially for DIYers. You can find pre-bagged mixes and essential tools needed for your paving job. Their wide store network makes it easy to access materials quickly without ordering in bulk.
Other local suppliers, such as Placemakers and Bunnings, also offer concrete mixes and paver supplies. These retailers are great for those working on smaller jobs or looking for extra materials like paving sand, spacers, or sealers.
Cost Expectations
Understanding the cost of concrete for pavers in NZ helps you budget accurately and avoid surprises. On average, concrete used for paving projects typically ranges from $80 to $150 per square metre. This variation depends on the type of mix, project size, and location. Standard concrete is usually on the lower end of the scale, while decorative or exposed aggregate mixes fall on the higher end.
If you’re hiring a supplier to deliver and mix the concrete on-site, factor in delivery or mixing fees, which can add $100 to $200, depending on the region and order size. Some companies offer free delivery for larger orders, so it’s worth asking about volume discounts or package deals. Bagged concrete from hardware stores is generally cheaper upfront but may cost more in time and effort, especially for larger areas.
When comparing costs, always ask for a detailed quote that includes the price per cubic metre or square metre, delivery charges, GST, and any extra fees for special mixes or remote locations. This ensures you’re making a fair comparison and helps you choose the supplier that offers the best value for your specific paving needs.
Ready to start your paving project? Visit us to explore concrete solutions, get expert advice, and find the right materials for your space.
FAQs: About Concrete For Pavers In NZ
What type of concrete is best for pavers in NZ?
Standard concrete mix is suitable for most residential paving. For driveways or heavy loads, a high-strength mix or reinforced concrete is recommended.
Can I pour concrete directly under pavers?
Yes, concrete can be used as a base, especially for areas needing extra stability. However, proper drainage and compaction are still essential.
How thick should concrete pavers be for driveways?
Pavers for driveways should be at least 50mm thick. For heavier vehicles or commercial use, 60mm or more is ideal.
Is concrete better than sand as a base for pavers?
Concrete provides a stronger, longer-lasting base. Sand is easier to work with and better suited for low-traffic or decorative areas.
Do I need a permit to install concrete pavers in NZ?
For most residential applications like patios or garden paths, no permit is needed. However, check with your local council for driveway or boundary work.
How long does it take for concrete under pavers to cure?
Concrete typically cures enough to walk on in 24–48 hours but needs 7 days to gain strength. Full curing takes 28 days.
Can I lay pavers myself or should I hire a professional?
DIY is possible for small projects with basic tools and prep. For large or load-bearing areas, hiring a professional is often safer and more efficient.
What is exposed aggregate concrete and should I use it?
Exposed aggregate is a decorative finish where stones are visible on the surface. It’s ideal for outdoor paving due to its texture and slip resistance.
How much does concrete for pavers cost in NZ?
Expect to pay $80–$150 per square metre, depending on the mix, supplier, and project size. Decorative options may cost more.
Where can I buy concrete for pavers in NZ?
You can purchase from local suppliers like Firth, Atlas Concrete, or Bunnings. Many offer pre-mixed bags and bulk delivery options.
Conclusion
Using concrete for pavers in NZ offers a smart, durable, and cost-effective solution for driveways, patios, walkways, and outdoor living spaces. Its strength, weather resistance, and design flexibility make it a reliable choice for both residential and commercial projects. Whether you’re taking on a DIY job or hiring a professional, planning ahead and selecting the right concrete mix is essential for long-lasting results. Always consider your specific site conditions, expected foot or vehicle traffic, and local climate when choosing materials. It’s also a good idea to consult with local experts or suppliers who understand New Zealand standards and can recommend the best options for your needs. Thinking of paving your space? Explore your local concrete suppliers in NZ and get started with confidence.